First, I want to be clear – this is not an original idea. When I first thought about an LED light on a telescoping pole several years ago, I found others already using a paint pole like this. So, with that disclaimer out the way, let’s continue with my particular project.
I started thinking about using an LED flood lamp on a telescoping pole for camp/area lighting several years ago. But the lights I wanted to use back then were all over $250 each. Too expensive for me. So I put the project on the back burner.
Since then, I’ve kept half an eye on LED flood lamps, with the offerings from Rigid always seeming to get my attention, but still always a bit pricey for my application. Just in the last year though, I’ve noticed that 12 volt LED lighting has started to become much more widely available and is getting much cheaper – with many Chinese lights at a fraction of what similar would have cost three years ago.
Then my neighbor got several new LED lights to install on his Jeep and when he told me how cheap he got them, I decided it was finally time to get my Paint Pole LED light project going. So, without doing any current research or comparison (I suggest you do…), I ordered from the same company my neighbor had, blitzpro.com. Two days later I had a rectangular 6 LED flood pattern light in my hands – for $60.
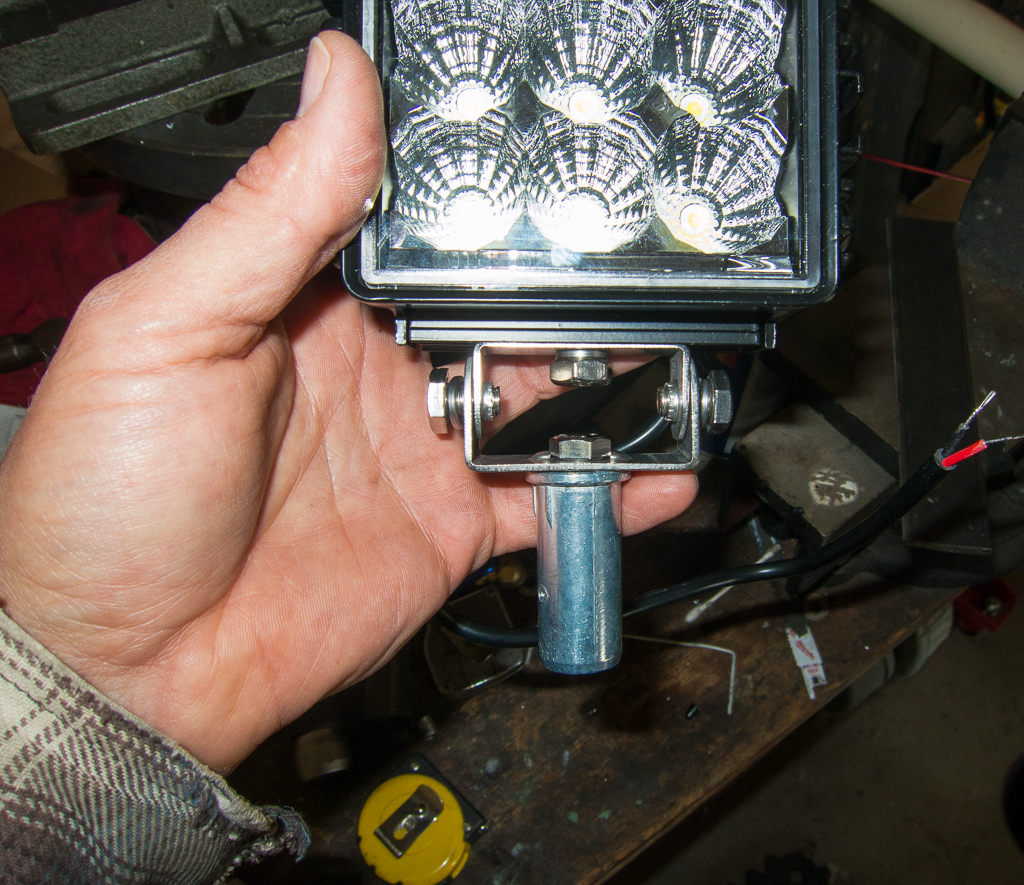
The light seems solid, with an aluminum housing, a lens measuring 4.5”x4.75”, containing 6x3W LEDs. It has an IP67 waterproofness rating, draws 18W and is listed as producing 1335 lumens (apply your normal mfg lumen claim skepticism…).
So, at any rate, $60 and I have my light in hand!

Everything else I used for this project, I already had lying around. No other money was spent. If you had to buy everything, you might spend an additional $40 or so. So call it a $100 project using this particular lamp. The project took about 3 hours to complete.
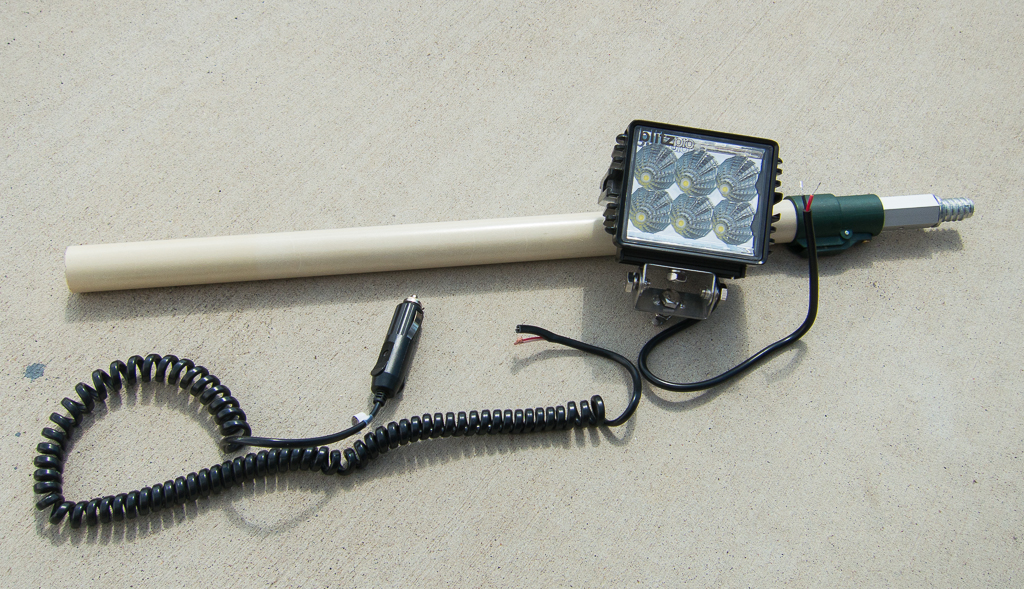
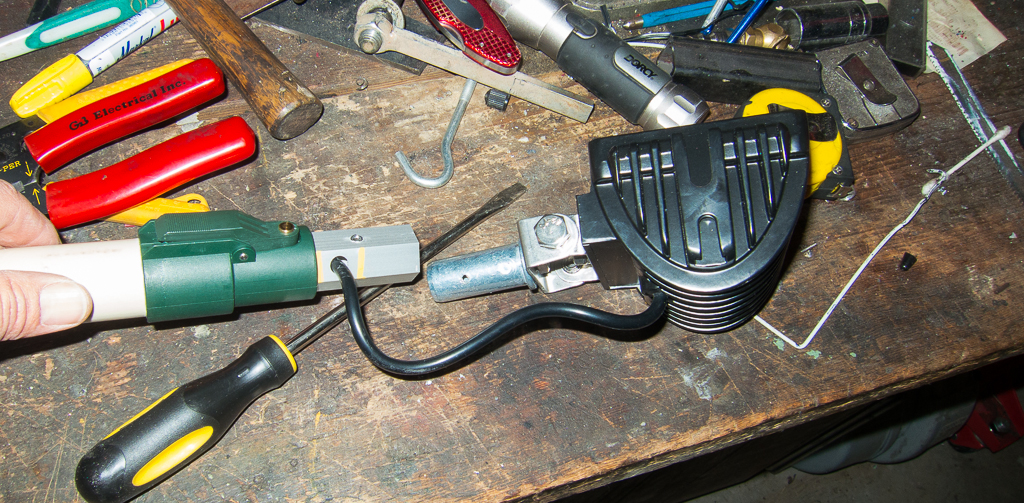
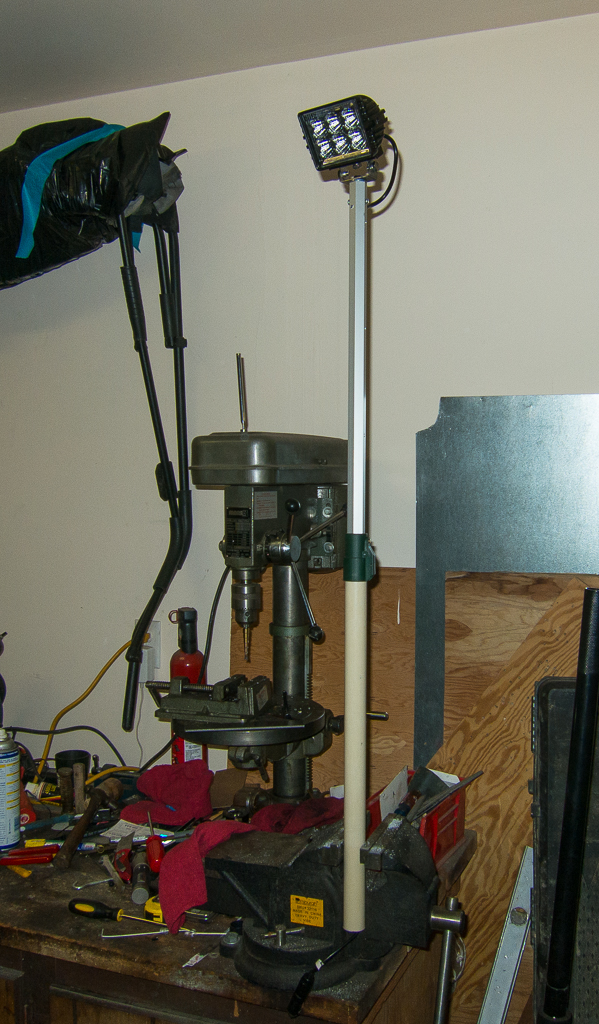
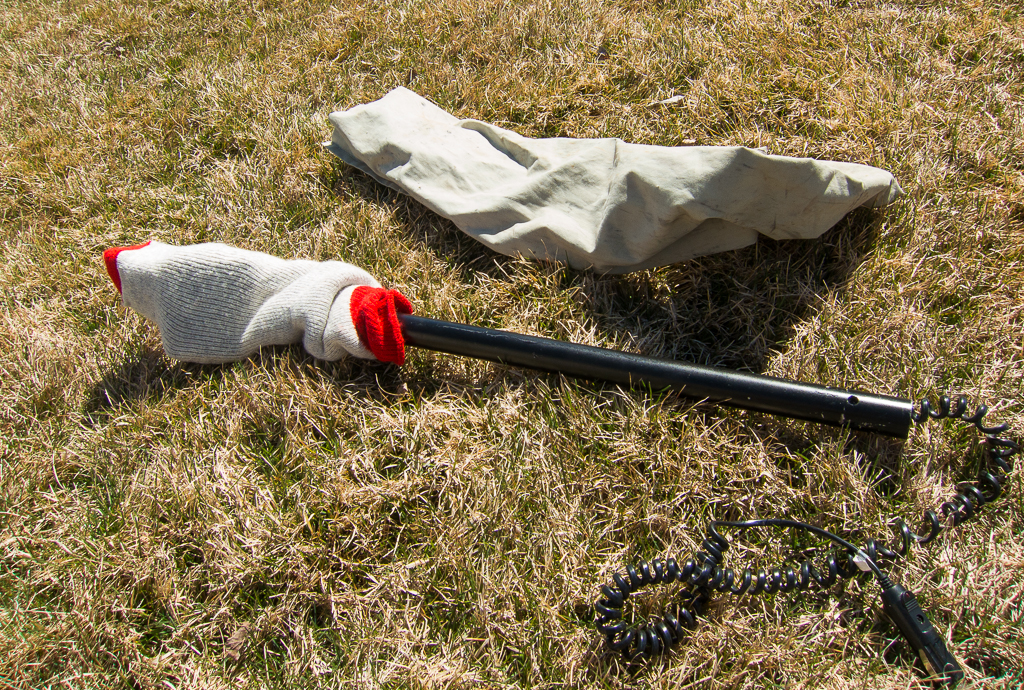
Here are the main components used, a telescoping paint pole, a 12V curly cord and the Blitzpro Hawk LED light.
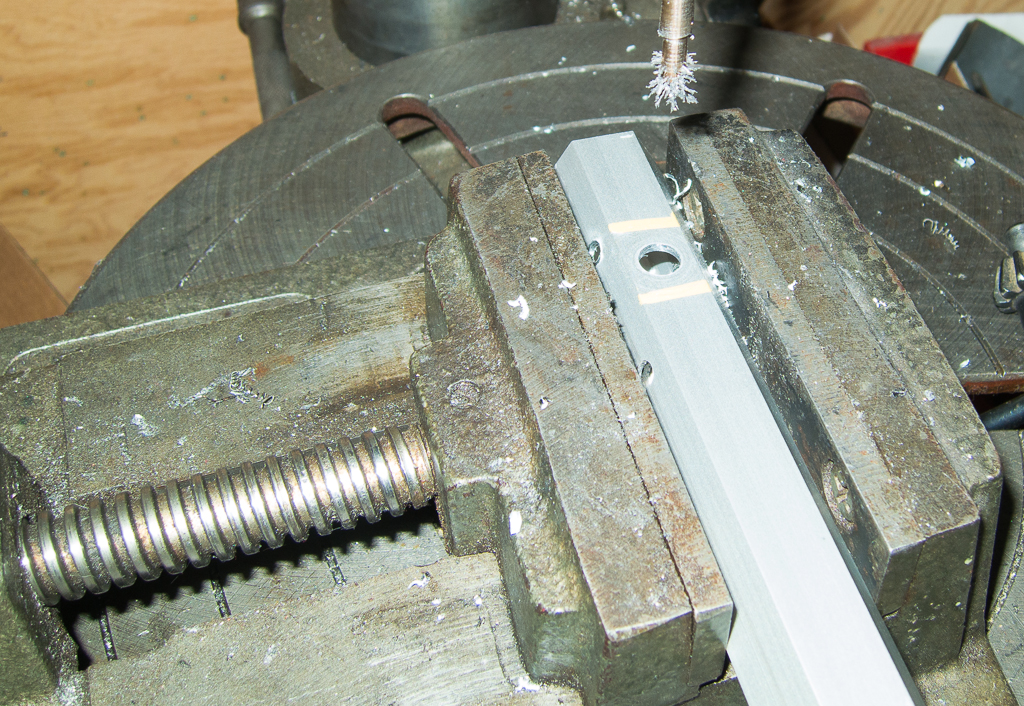
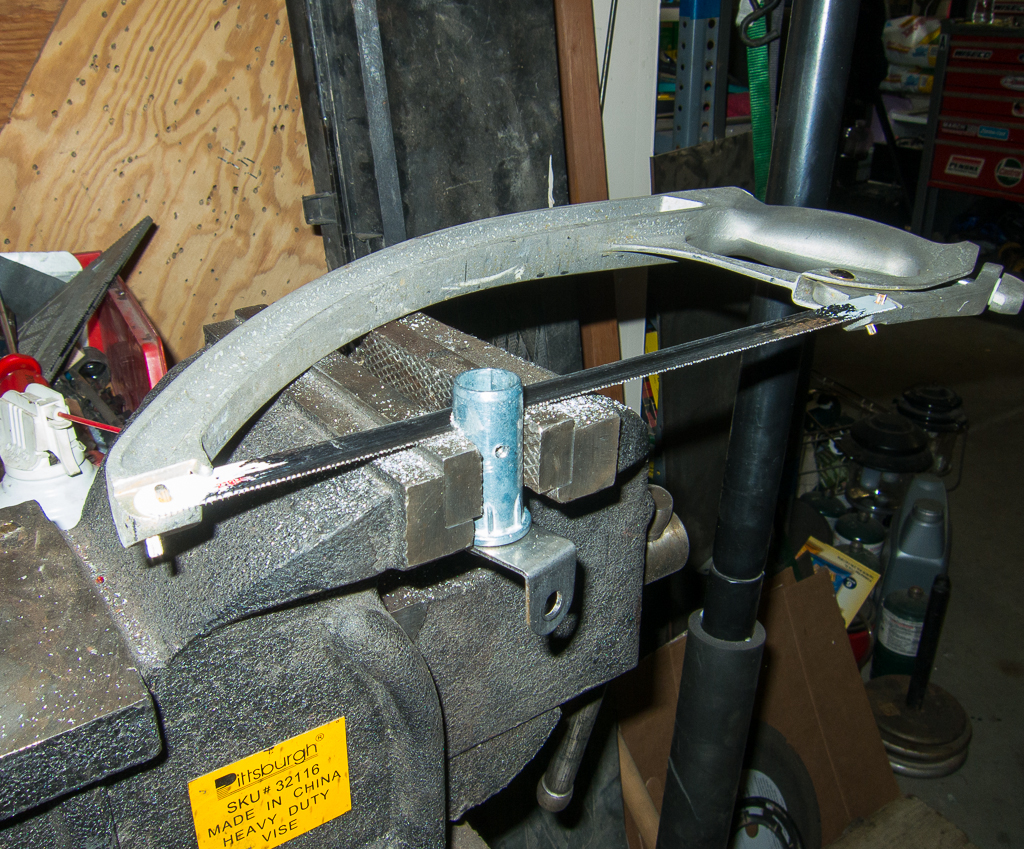
The first step was to saw off the threaded end of the paint pole and grind the top flat.
Next I removed the two screws holding the top piece in the pole to work on it separately. Then drilled a larger hole for the bolt to pass through.
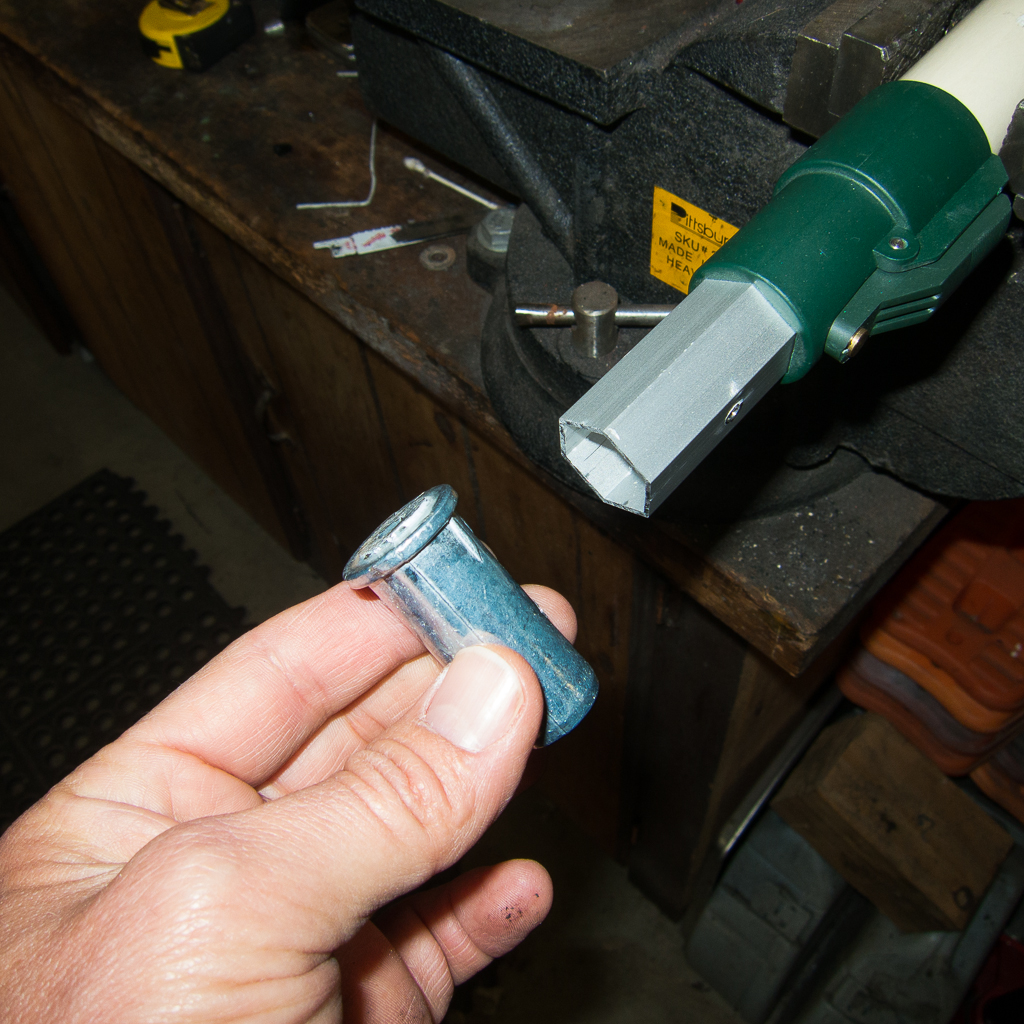
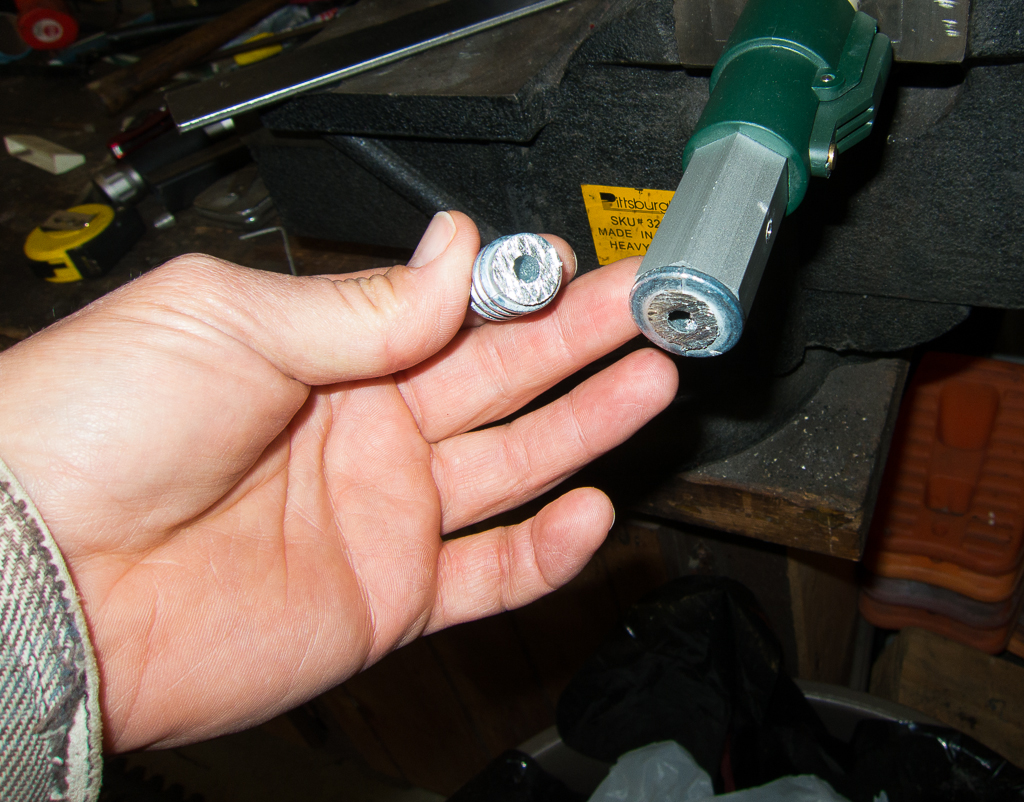
I discovered that the nut with the included bracket was too large for the internal recess of the paint pole top piece. I simply reshaped the outer diameter of the included nut on the bench grinder. With that done the bracket bolted easily and securely to the top piece.
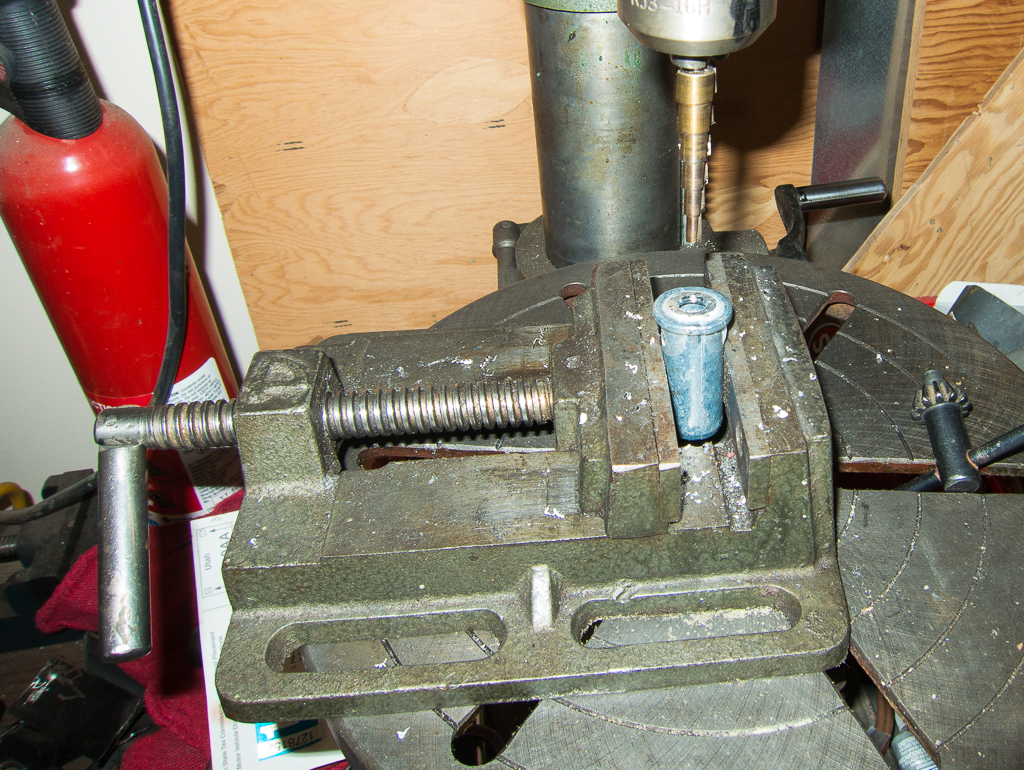
After that I drilled a hole near the top of the pole for the cord to pass through – being sure to locate it so that it would not be blocked with the pole fully collapsed.
Then I simply fished the end of the curly cord all the way through the pole and out through the hole I had just drilled.
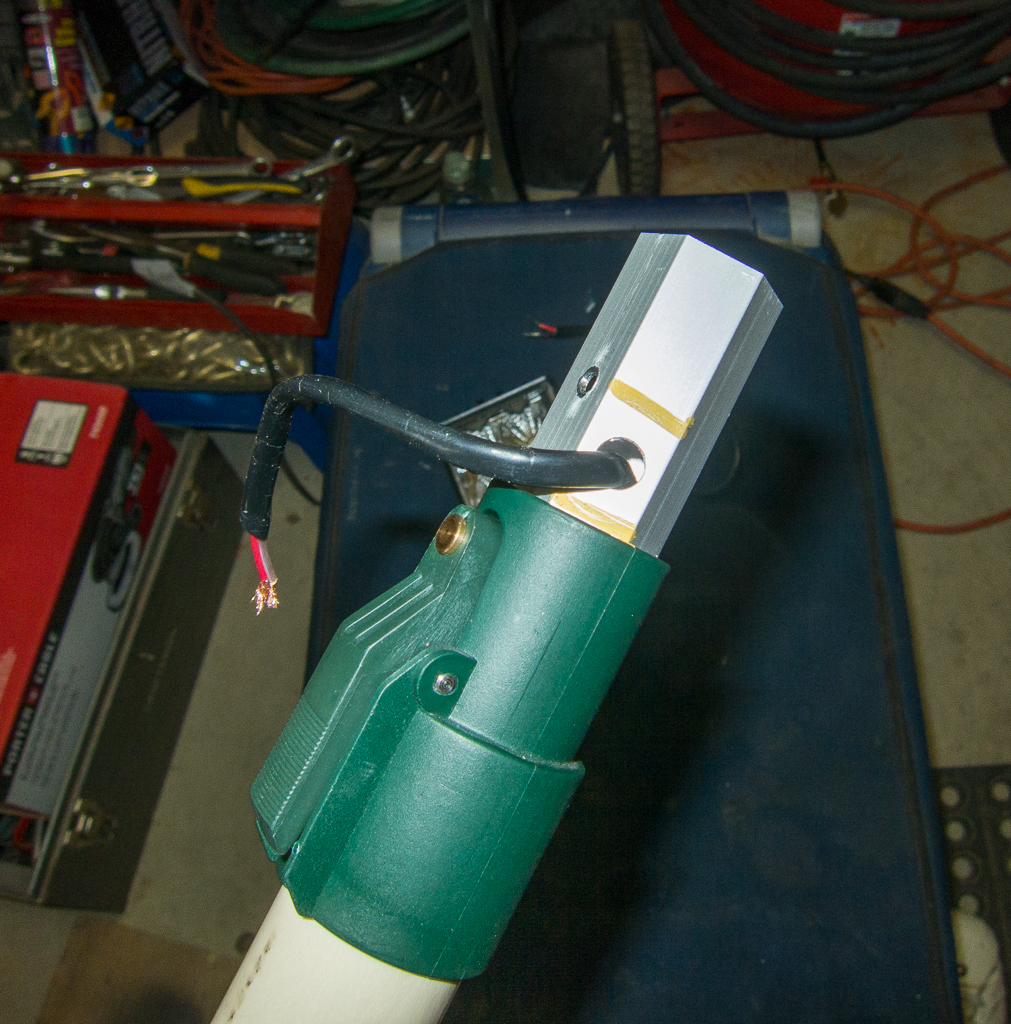
I then soldered the wires and protected the soldered joints with heat shrink tubing. Taking care to offset the splices and keep them slim, so that the whole works could be pulled back through the drilled hole into the inside of the pole.
Next I went to reinstall the top piece back into the pole. This is when I found out that the length of the top piece below the screw holes for holding it in, was hitting the cord, preventing the top from being fully reinserted. A hacksaw made quick work of fixing that.
And that’s it for the pole itself – done!
Next up was the mount. Obviously, I made a mount specific to my vehicle and my wishes. You might choose to go in very different directions here. I did not want my light to be hard mounted or hard wired. I needed it to be portable, using a 12V accessory plug rather than be hardwired. And I already have good reverse lights, I didn’t need or want it to serve that purpose. I want to use it not just on the back of the Jeep for camp/area lighting, but to the front of the vehicle, the side, underneath, around other vehicles etc. It needed to be very portable. You may choose to hard mount and hard wire. You could even make it a reverse light if you wished.
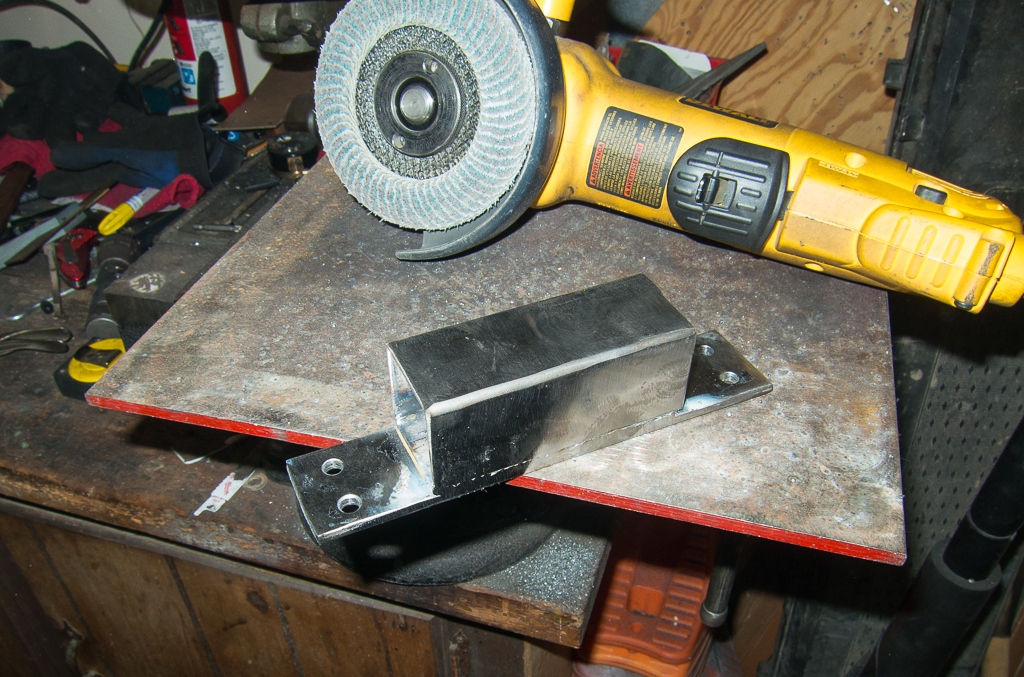
Anyway… Using only scrap materials on hand, I made a very simple mount to use on the swing out tire carrier on the back of my Jeep. Here is the material used.

I wish I had round pipe of the proper size on hand, but I had none laying around. I did have this square tube that provided a somewhat sloppy fit, but adequate for the purpose.
Here is the mount after welding, ready for paint.
Except… It wasn’t really for paint yet after all… My first thought was to attach it to the rack upright, close to what is shown here.
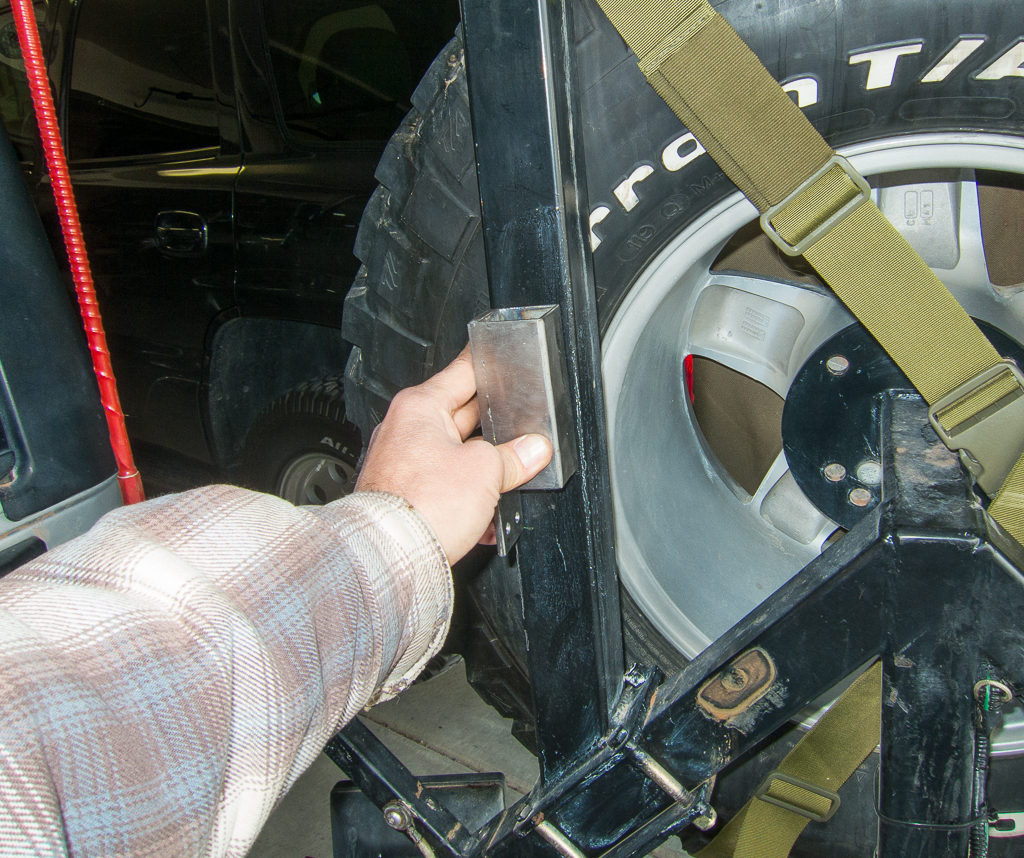
But after some testing, I decided too much of the light would be shaded by the rear glass when raised, the light would more effective if moved out from the rear a bit more. So I cut off the top part and repositioned and re-welded it to accommodate mounting on the center portion of the tire carrier. Finishing touches included drilling one more set of holes for a tethered lynch pin. Then the mount really was ready for paint. And here it is installed.
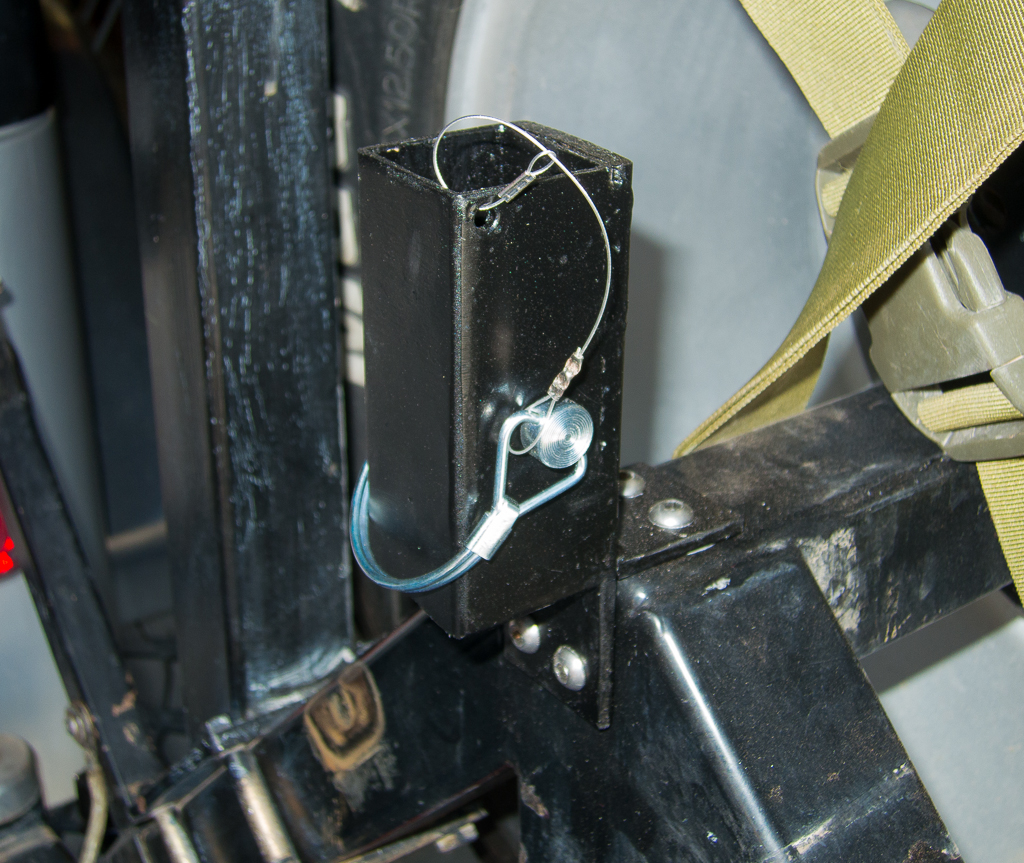
Note, I drilled holes around the base of the pole that the lynch pin can go through, to hold the pole in place both vertically and rotationally. But, in normal use, all that really needs to be done is to drop the pole in the square tube and let the lynch pin do nothing more than prevent it from falling through. I’ve found that simply turning the pole to point the light where I need it and letting friction keep it from moving works perfectly well.
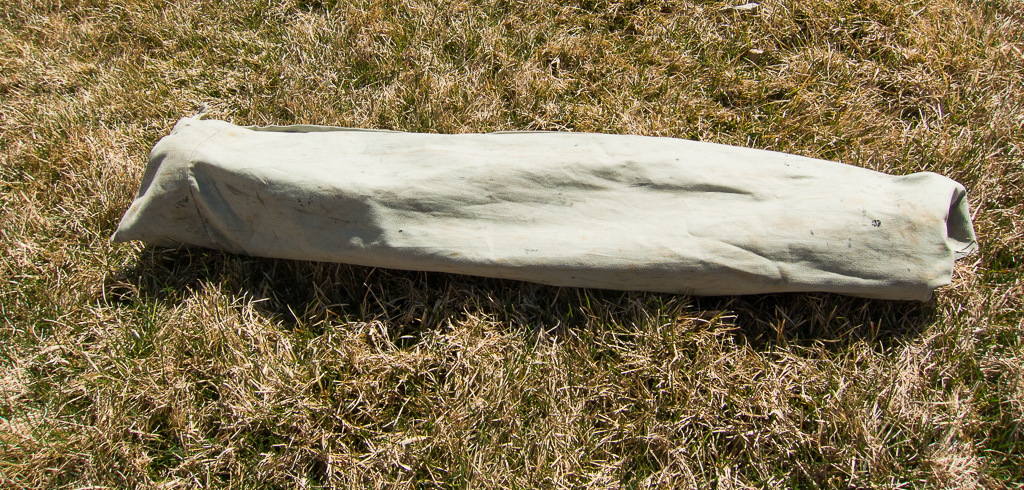
For storage and transport a heavy sock protects the lamp and the entire pole then goes in an old cut down canvas tent pole bag.
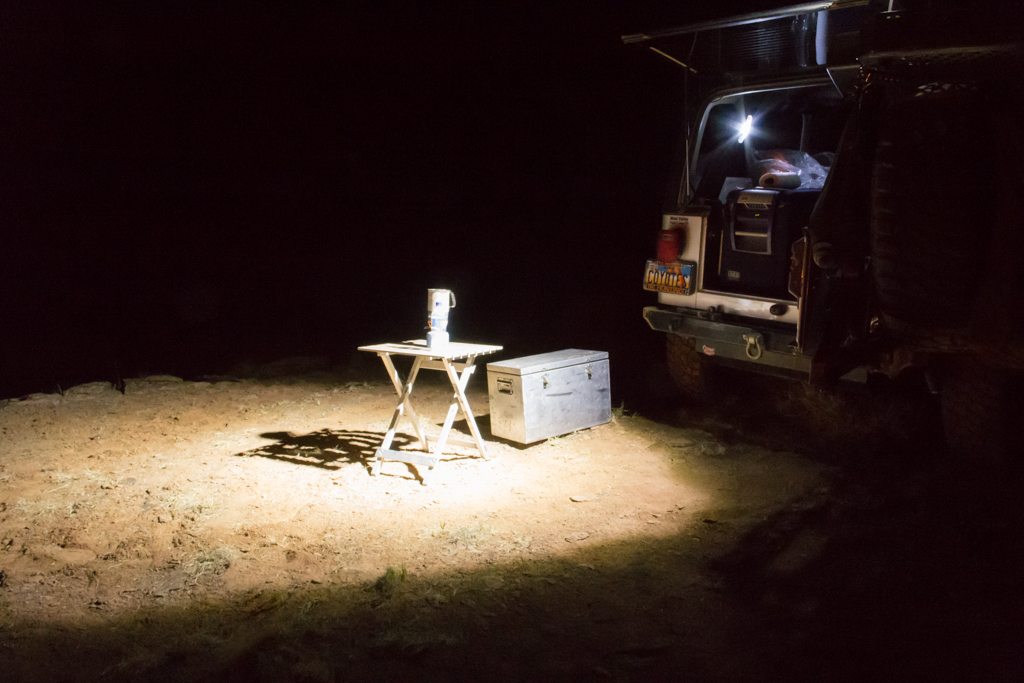
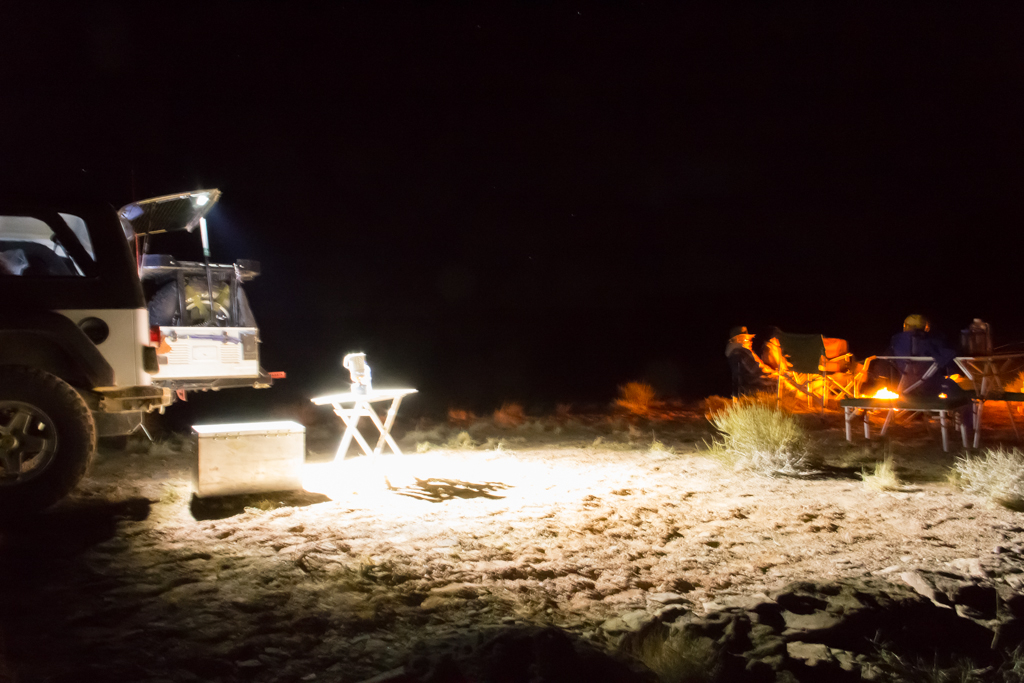
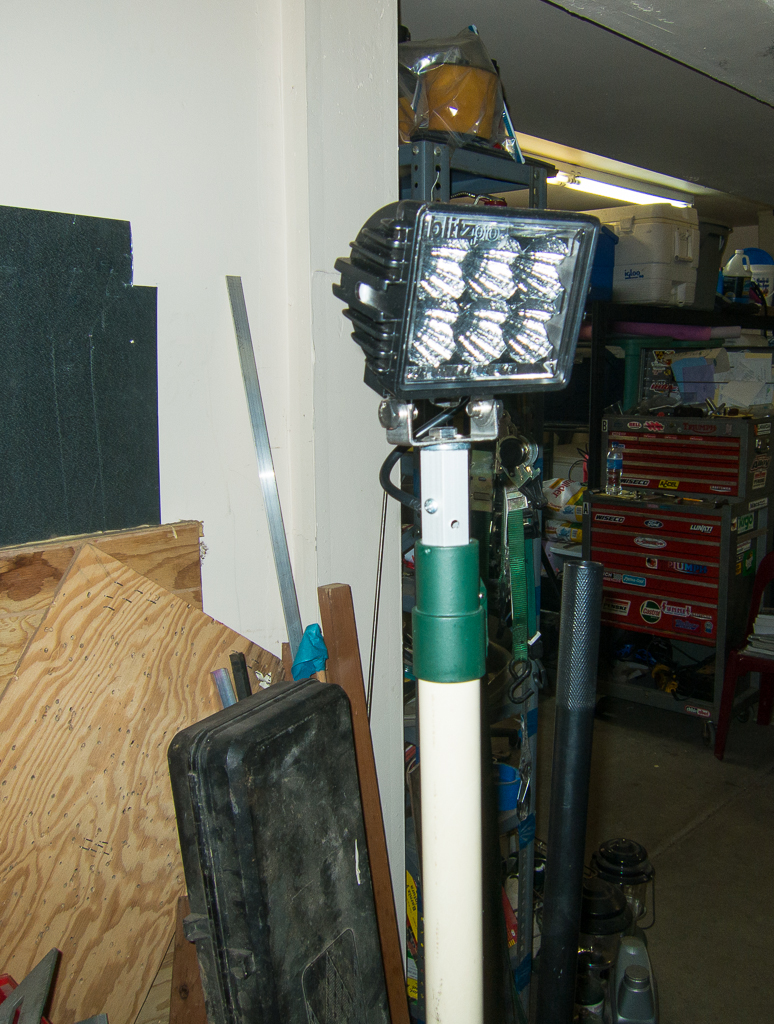
The finished pole, mounted on the Jeep.

In field use, the project is a complete success. It does exactly what I wanted it to do – deploys quickly and provides good area lighting for camp chores after dark, with low current draw.